|
Why does organizing on your own not always work? There are many reasons, but here are some of the top organizing mistakes we see in clients' homes:
Top Mistake to Avoid: Buying organizing products without measuring. How many times have you been shopping and found the cutest containers that you just know will fix all of your organizing problems? If the answer to this question is "often" but you haven't measured the space first, you’re going to end up with some super cute containers that might just add to the clutter in your home. Measure your space first and then go shopping! Second Mistake to Avoid: Not returning the organizing product that doesn’t work. So you didn’t take the advice of the first tip and made some impulse purchases of items you felt would work perfectly in the space you want to organize and they don’t fit. They’re too deep, they’re too tall, they don’t hold the entire category you need them to, etc. But then you fall into the fatal trap that so many Americans fall into: you never return them! These unused items just end up becoming more clutter in your home and a loss of money. Don’t fall victim to this, and return those containers! Get your money back and invest in containers that will get the job done. Third Mistake to Avoid: Not categorizing your items that are in containers. This completely defeats the purpose of containing your belongings! To better utilize your organizing products, sort like-with-like and contain each category in a container. Micro-sorting works best for categories you’re always going to have in your home, not categories that rotate or change. Sort like with like throughout your home and you’ll start to see organized spaces emerging throughout. Fourth Mistake to Avoid: Not leaving enough time to complete the project. People often underestimate how long it takes to thoroughly organize a space. We as professionals can estimate how long a project will take, but even those estimates are just our best guess because unforeseen things can pop up! When you organize on your own you want to be very generous with the amount of time you leave in your schedule to complete it. The volume of stuff in a space and the speed at which you can make decisions during purging influences it greatly. When in doubt, block off more time than you think you’ll need by at least double and that will likely allow you to get closer to finishing the space thoroughly. Fifth Mistake to Avoid: Getting distracted. There are a lot of things that can distract you when you’re attempting to organize. Your cell phone is the top offender. Try putting your phone on silent and only allow contacts that would call or text if there were an emergency to come through. Traveling down memory lane while purging often also distracts people. Try not to get derailed by sharing pictures via text message to family and friends, and tell yourself you can revisit them when you're finished! Another way that people will get distracted is by putting away things that belong in other rooms mid-project. Instead, create a redistribution container for each floor of the house so that you can put what you find in it and put it away once you’re totally done organizing that room. Sixth Mistake to Avoid: Not labeling. Labels are a map, if everyone in the home can read the map they will get to the same destination: an organized home. Often people will skip labeling when organizing on their own and this makes it hard to maintain the space especially when multiple people are using the space. It helps you remember where things go and makes it easier to find things when you need them. Above all, it keeps everyone on the same page. Labels are our friend, we strongly encourage you to label! Seventh Mistake to Avoid: Not explaining the organization to everyone else who lives in the home. When we come into someone’s home and organize a space, we end with the walk-through to show them where everything ended up, the changes we made and to explain why we made them. This is imperative for you to do when you organize on your own with your family. This will help them feel included, answer any questions they may have when looking for something and allows you to explain why maintaining the organization is important to you. Once you’re done organizing a space show it off and do a walk-through with the rest of the family, get them excited about the newly organized space! Eighth Mistake to Avoid: Expecting organizing to be a one-and-done type of situation. Too often people will say to me, “So I don’t have to do this for another twenty years, right?” The answer is no, you need to organize every day to maintain the work and money you’ve put into it! Organizing requires maintenance. Just like you need to brush your teeth at least twice a day to maintain good dental hygiene you need to put things away, throw trash away right away, and purge unwanted items regularly to maintain the hygiene of your home. It is better to accept this than to avoid it, it becomes almost meditative when you get in the groove of just making it part of your day. Outer order creates inner calm and the only way to get there is by working at it every day. Ninth Mistake to Avoid: Not dropping off donations. This is such a common mistake that there are memes about it. We recommend doing a porch pickup or blocking off a time and date on your calendar for when you’re going to drop them off and stick to that as if it’s an appointment. Don’t let those donations clutter up your mudroom, garage, or car any longer! You’ll feel so much better for it. If you have made some of these mistakes in the past, that’s okay! The idea of this is to help you understand why organizing on your own may not be working and to give you ways to remedy that. If you start avoiding these mistakes you’ll find that your home is more organized, you’ll start saving money and you help others faster by getting your donations to them sooner. Happy organizing! Melissa Fortino
0 Comments
Often times people simply do not know where to begin when it comes to organizing a space, especially when there’s a lot of clutter. Here’s a step by step guide on how to sort and purge a room which is the first phase of getting organized. It’s a map you can follow that can feel more like a game and less like a chore. This is fun to teach kids, as well!
Step 1: Starting at the Door, Sort and Purge the Floor! (See what I did there?) Work your way around the room clockwise, making decisions on each item until all items on the floor have been taken care of. For each item in the room, you are going to decide what to keep and what to get rid of. You should keep items in the rooms that you use them in, sorting like-items together before “organizing” them into permanent homes (more on this below). This helps you to visualize how much space you will need to properly organize each category. Once the floor is completely clear take a step back and look at how great the room already looks! If you have time for nothing else, just getting the floor clear makes a huge difference! A few questions might come up while you’re decluttering, such as: “What do I do if I come across items that need to move to another room?” Our advice is to grab a few empty baskets and start “relocation” baskets to compile these items into and redistribute them later. It’s helpful to divide the items into three categories: main floor, second floor and basement. This is more efficient than running them around the house as you come across them. (Laundry baskets work great for this!) “What do I do with items that I don’t want anymore?” The items you want to get rid of should be sorted into different categories, such as:
Once you’re finished Step 1, it’s time to move on to... Step 2: Sort and Purge Surfaces, Cabinets & Drawers Go back to the door and work your way around the room clockwise, sorting and purging the items on the countertops, followed by the cabinets and drawers immediately above or below. Focus on the perimeter of the room and then move on to furniture/islands in the center of the room. Once you’ve sorted and purged the center of the room you’re done sorting and purging! At this point it may feel a bit overwhelming to have unloaded so much but just remember it gets worse before it gets better! To keep perspective look at how much is moving out via trash, recycle, shred, donate and sell! You’re making progress and those are items you never have to make another decision about again. Step 3: Organize Items Staying in the Room
5. Put away the items that need to go to other rooms. If you don’t have a home yet for the item in it’s new room, just setting it in that room works for now. The idea is that you’re shifting things to the correct room so that when you get to organizing that room the items that belong in there are in there. That is how you sort and purge a room thoroughly. If you follow this map it gives you a starting point, middle and an end, the three things most people can’t see when they’re overwhelmed by clutter. I hope this helps you get started on organizing today! Happy sorting and purging! Melissa Fortino We see it all the time in our line of work, the desire to get organized resulting in the excessive purchase of organizing products that don't seem to fix the problem and sometimes even add to the clutter. Here's how to avoid having a surplus of ill-fitting organizers in your home.
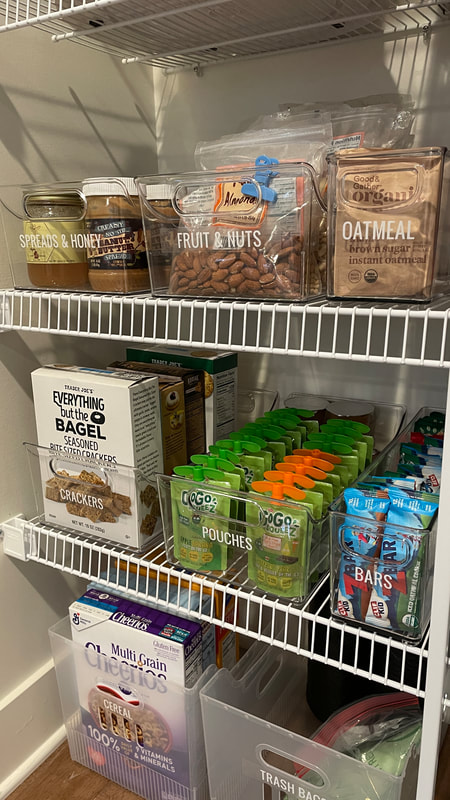
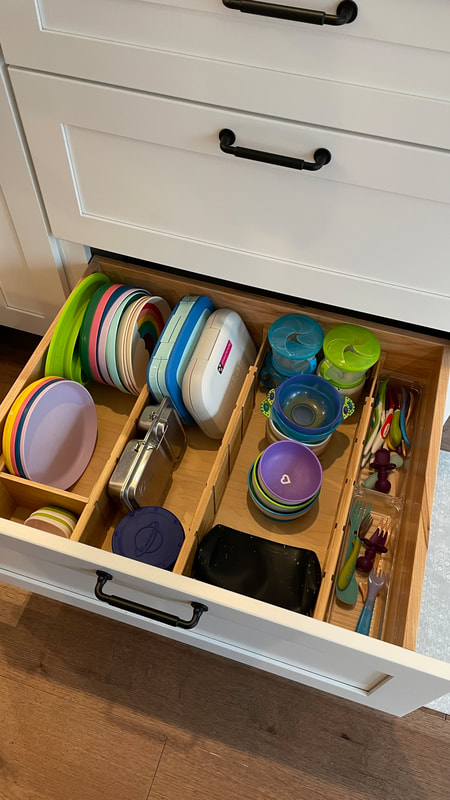
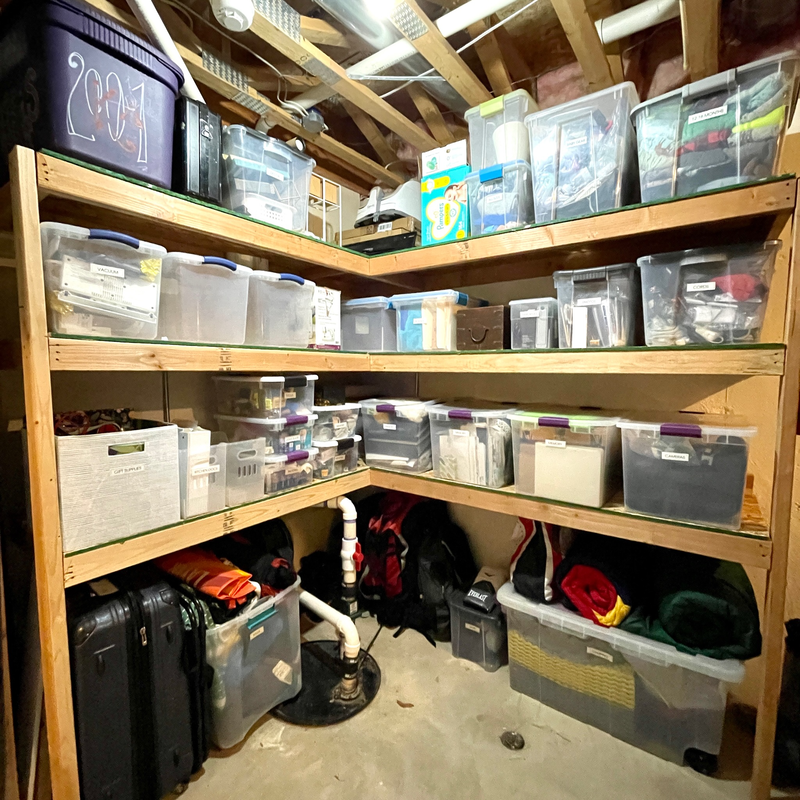
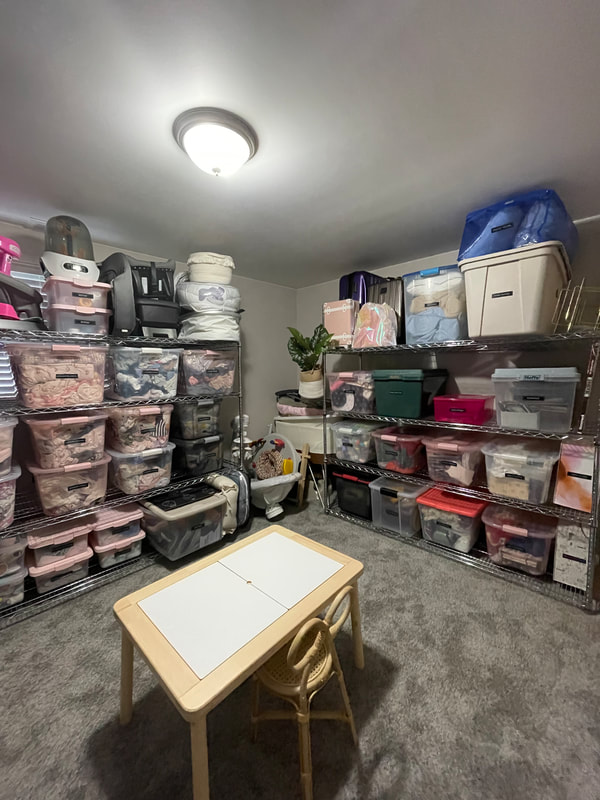
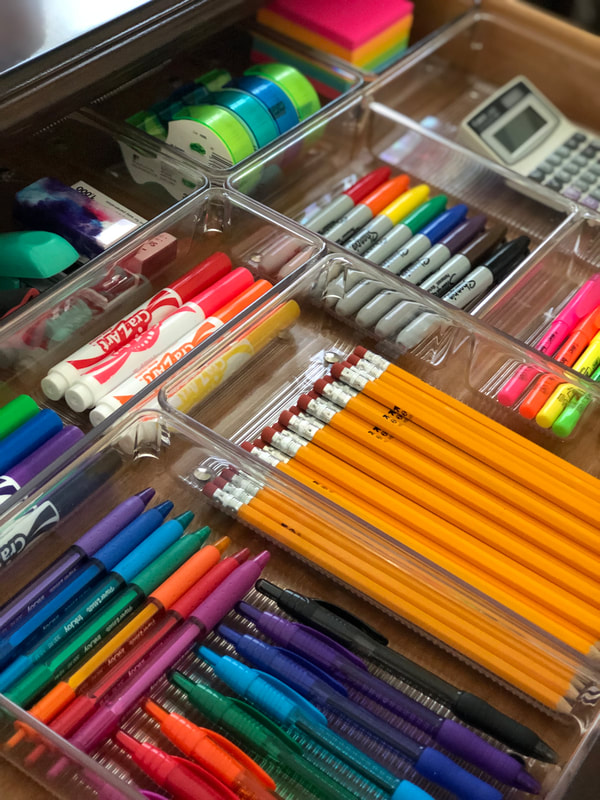
Tip Number One: Measure before you shop! We can't say this one loud enough or often enough. Don't guesstimate by eyeballing it or fall victim to buying something just because it's a good deal. Take the time to measure the space you're organizing by taking good and accurate measurements. Be sure to measure the width, length, and height. When measuring cabinets be aware of supports and hinges that may hinder pulling a basket or bin out and take measurements accordingly. Measure the lip of the cabinet if it sticks up to make sure drawer organizers will work. Take note of the measurements and take the measurements with you when going to the store or reference them when doing online shopping. It will take some math to figure out if the organizers will fit the space but you will love the result if you measure before you shop. Tip Number Two: Gather ideas from a professional. Watch our stories, posts, and reels on Instagram and Facebook for ideas on the best organizing products we love and use the most. Many of them can be used in your space as well (which you can confirm by measuring). We often share the names of the products and where you can purchase them. There are hundreds of ideas just waiting for you on our social media so be sure to utilize that tool to your advantage. Tip Number Three: Decide on whether or not you want clear containers, ones that you can't see through, or a mixture of both. Everyone and every space is different. For those who are extremely visual, we often recommend clear acrylic organizers so you can see what's inside. If you want to make it so that you see the clean lines of bins or baskets instead bin labels help you know what's inside and are a visual reminder of where you've put what. We recommend labeling those clear containers as well. For basement storage rooms we often recommend clear bins with lids that are clearly labeled. Tip Number Four: Give your space an elevated and textured look by combining the containers you use. For example, in one pantry we may use water hyacinth baskets, clear acrylic bins, and wood stackable bins to create variation and depth in the space. Don't be afraid to mix and match in an orderly and symmetrical way. It doesn't have to be all the same bins for an entire space. Make sure they coordinate though so that it doesn't have a cluttered look. You can match the look of your home to your organizers. Tip Number Five: Decide on a budget before you go shopping. Take a look at your financials and decide how much money you have available to invest in organizing products. It can add up fast and often costs more than people think so knowing how much money you have to work with will help you make good choices while you're shopping and will direct you toward the right product line. Tip Number Six: Decide what is the most important attribute to you: style/aesthetics, function, or budget. This will help you when you're shopping to know which direction to go with the product lines you look at. Having a clear vision of what's most important to you will help you determine what organizers will help you achieve that. Tip Number Seven: Think outside the box. Our best organizing solutions stem from thinking outside the box. Have a corner cabinet that is a lost cause? Add a lazy Susan so that you can easily access everything you want to store in there. Have cans begun to overrun your pantry landing on different shelves? Purchase a can organizer that fits your space. Not sure why your closet looks cluttered even once it's organized? Buy matching hangers and watch it transform your space. Don't do what you've always done if it's no longer working for you. Change it up, start over, and begin again. The right product in the right space makes the puzzle come together in a way that can be both beautiful and functional. Tip Number Eight: Use drawer dividers with inserts that allow you to customize your drawer to fit what you house there. Match the color of the drawer divider to the interior color of your drawer. These often get the biggest wow response from our clients when they see the drawer. The dividers fill the drawer making it look as though they have been built custom just for you. Overwhelmed by the thought of buying products? Let us do the shopping for you! When you purchase one of our organizing packages, we measure, consult with you on what your goals are, come up with ideas, do the shopping, and put them into place in your home. You don't have to do this alone! Melissa Fortino You've collected the ideas on Pinterest. You've purchased containers. You long for an organized home. But you're lacking one thing: motivation. Where does it come from and how do you get it? Well, there are lots of tips and tricks out there on how to get motivated but here are three easy things you can do to help you get going toward your dream organized home.
Step One: Think about why you want to organize. Is it to declutter your home so that you feel less overwhelmed? Is it to save time and money? Is it because your children struggle to find toys to play with and can't find a clear space to do homework? There are a lot of reasons why you might want to get organized. You have to get clear on your why first, in order to get motivated. Organizing is a part of self-care. Outer-order brings inner-calm. Step Two: Envision your home being organized. This can be a tricky one for some people especially if they've always lived in a cluttered home. Use your imagination and start to clear the space, item by item, one thing at a time. Imagine how it will feel to no longer have clutter. Imagine clear floors, tidy counters, and a made bed. Imagine every detail of your favorite room in your house. You can do this by sitting in a seated position with your feet pressed to the floor, sitting upright with your eyes closed. If you meditate sit in the position you typically meditate in. Breathe deep and slow, in and out, seeing the finished and organized space in your mind. Feel the difference in how the room feels. Now shift your mind to the fact that you can make this a reality. You can and will achieve an organized home. Nothing is stopping you from it and you can tackle it one item at a time, room by room until your home is complete. Step Three: Decide which room or closet you're going to start with. The desire to do everything all at once is real, so breaking down your home into smaller more manageable pieces is the best way to go. Think about the space that is causing you the most stress on a day-to-day basis or that you're the least likely to tackle. Whichever room comes to mind first that is where you should begin. If you can conquer this room the rest of your house will fall into place like dominos. Once you've decided which room or closet you're going to start with, get started now. If you're unable to start now due to an appointment or other obligation, block off time on your calendar for when you're going to organize that room and stick to it as if it was a doctor's appointment or something you wouldn't miss if scheduled on your calendar. This will help you schedule around this time and will ensure you have the time to get your first space organized. By figuring out your why, envisioning the space, and making that first decision of where to begin, you're going to feel motivated to start! Dig deep and find the strength and energy to begin, I know you can do it! You're just three easy steps away from getting started. Motivation can be fleeting so strike while the iron is hot! Get moving and tackle that space. Still struggling to find motivation? Give us a call and schedule an appointment with us, we'll keep you focused and will motivate you to get it done. I believe in you! Melissa Fortino There are many benefits to being organized as you roll into the New Year. The first and most important one is that it will, without a doubt, lower your stress level. Imagine coming home and finding exactly what you need when you need it. A home that you look forward to returning to over and over again because it is an oasis that works for you, rather than against you. Lowering your stress levels has a great impact on all areas of your life, your health included. Having less stress in your life means that you'll be able to focus on what matters, like your family and friends. Less stress also means you'll be able to sleep easier and will be able to think more clearly. Overall, you'll find yourself feeling lighter and freer. You'll look forward to walking in the door, wrapped by the warm hug of an organized home.
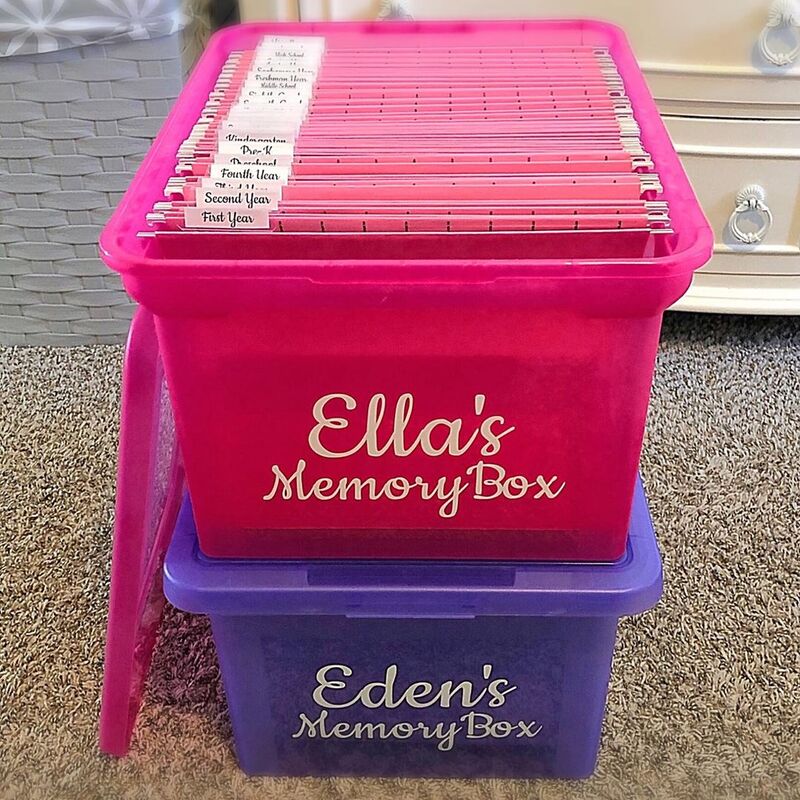
In addition to less stress, you'll also save money once you're organized because you'll find what you need when you need it. The double, triple & quadruple buying that is happening in homes stops once you get organized. You can see your full inventory of each like item once they're grouped in a proper home instead of tucked and shoved away all over the house. You'll stop throwing away expired food, and in turn save money, because you'll start using what you have in your refrigerator, freezer, and pantry. Being organized changes the way you shop. You start to think "Will I need, love, and use this if I bring it home?" before you make a purchase. You consider where it will live, and if your space is maxed out that's a sign it's time to skip the purchase, which saves you money. Time is another thing gained by being organized. You'll save so much time by knowing exactly where everything is in your home once it's organized. You'll no longer lose minutes, hours, weeks, and months throughout your lifetime looking for lost items in your home or office. It takes time to get organized but that time comes back to you tenfold in saved time when you need something. You'll get ready faster in the morning because your closet will only house clothing you love and that makes you feel good. Making decisions will take less time because you can easily see what you have. You'll spend less time shopping because you'll go shopping in your home through the items you already own. If you're a parent the benefit of being organized reaches beyond yourself and can help build lifelong habits that will benefit your children for years to come. It sets a great example for them to follow. It takes time and hard work to teach organization skills but it is so worth it. Your children can become more conscientious roommates and spouses down the road, and it will set a good foundation for them that will stay with them throughout their lives. Organizing is for all ages and can be fun. It is often a learned skill that has the potential to start at home when they're young! Less stress, saved money, more time back, and a lasting foundation for your children are some of the best benefits you can gain by rolling into the New Year being organized. Do you wish you were more organized, but are not sure where to begin? Give us a call, we can help you get here faster. Happy New Year & Cheers to getting organized! Melissa Fortino We all despise getting mail & paperwork that comes into the house, right? Mail can trigger anxiety and feelings of uncertainty! For some, it’s about not having the time to go through everything. For others, it’s a matter of indecision about what to keep or toss. Today, I will share some tips and tricks to make processing mail and organizing paperwork less overwhelming. Step One: Getting your mail out of the mailbox or paperwork out of your child’s backpack is the first step. Step Two: Ideally, you can walk straight to your recycle or trash container and pitch the junk mail before you walk in the door. You know, the stuff you don’t need to take action on and won't actually reference later. Think junk mailers and that sort of mail. You also don’t need to shred these items. Step Three: If you are like me and do not have access to a recycle or trash container before you walk in the door, you need a place to set your mail so you can get settled, such as a drop zone that is not the kitchen counter. A drop zone is a place to set your purse down, take off your coat and hang your keys, such as a wall hanging inbox near the door. You can have one inbox or multiple inboxes for each family member, the choice is yours! An inbox also acts as a boundary. If you see that inbox getting full, it’s time to go through the mail! Ideally, you would go through the mail immediately or once a day. If that is not possible, you will want to plan to do it at least once a week so you don't miss vital pieces of mail. Step Four: Let's go through your inbox or stack of mail, if you haven’t already. Now is the time to put trash items in the trash or recycle bin and shred documents containing private personal information before tossing it in the trash. Step Five: If something needs to have an action taken on it (think RSVP to a wedding, pay a bill, etc.) ideally, you take action on it right away. However, if you don’t have time, this is where a desktop paper organizer can come in handy. It's a home for the correspondence you need to take action on. Again, this creates a boundary; once that desktop organizer starts to look full, it is time to go through it. Ignoring the pile longer than a week may cause you to miss important deadlines, so proclaim a day like Sunday to be Mail Sorting Day in your house. Step Six: If the piece of mail or paperwork is something you need to reference later and no further action is necessary, it’s time to file it. I recommend that every home have a hanging file system. Whether you get a cute hanging file organizer that lives on your bookshelf or actual file drawers will likely be determined by how much space you have, how many files you have, and your preferred aesthetic. It’s best to organize your files alphabetically so that you can find your files later when you need them. An example of something that needs to be filed would be a W2 that arrives for tax purposes. You can create a 2023 Tax file and put all relevant documents there until it’s time to do your taxes. Another example would be your car’s registration. While one copy goes in your glove box, the other can go in your Auto file. It’s best to do a quick purge of each file folder every time you put something new in it to make sure everything in your files is current. Step Seven: If the item that came in the mail is sentimental, for example, a card from your grandma, put it in a designated memorabilia bin with a lid that lives in your basement storage room on a shelving unit. I recommend creating a tote/bin for each family member and one for the couple if a couple is living together in the home. This gives you a home for artwork the kids make, anniversary cards you want to keep, and that sentimental mug you don’t use but want to keep; it doesn't belong in your kitchen anymore! The keepsake bins are a lifesaver for collecting your treasures and keeping them safe. By following these 7 steps, you’ll have peace of mind, less clutter, and above all, less stress.
Happy organizing! - Melissa Fortino Tip One: Throw trash away immediately. The idea may sound simple, as we often hear people often say things like “I’m not a hoarder,” or "I don't keep trash in my home," though there is rarely a job we come across where there isn’t some trash that gets thrown away during sorting and purging. I urge you to look around your house with what I call 'organizer eyes'. That piece of mail that you don’t need? It’s trash. That receipt from 5 months ago in your wallet? Trash. The tags on the pants you’re not returning. That’s trash, too! Identify the items for what they are and throw them away right away. It will reduce clutter and stress so fast that you will find yourself looking for trash on autopilot from here on out! Tip Two: Pick up as you go. Instead of leaving a trail of items behind you as you go through your day, put them away as you use them. For example, when I do my hair, instead of leaving the comb, blow dryer and curling iron out afterwards, I put them all away when I'm done using them. They each have a home in my bathroom, helping to keep my counters clutter free. This step is, of course, much easier if you have a home for everything, so getting organized first is a key to success. Imagine picking up as you go instead of spending entire afternoons on the weekend putting things away throughout your home, or in the evenings the day before your cleaning service comes. It is a time saver and makes household maintenance much easier in the long run. Tip Three: Keep like-with-like. If you organize everything in your home this way, you will be able to find what you need when you need it. This means, for example, all of your vases together, all of your spare home décor together, and all of your candles together. This is especially important in your kitchen. A pantry and kitchen organized this way will save you time and money. Like-with-like makes it so you don’t over-purchase because you can see how much you have of each category. It also allows you to organize items into a space that fits the entire category together. If the category doesn’t fit in once space, it is time to pick a new space or declutter some of that category. These three tips are easy to remember but harder to implement. It takes discipline and time initially, but once you get organized, these tips will maintain organization in your home in a simple way that will become habit. You’ll do them without even thinking. Make a sign to hang on your fridge or in your office that says Throw Trash Away Right Away, Pick up as You Go and Like with Like until you have them memorized. It’s amazing how much stress these tips eliminate and how much time and money it will save you. Begin today, and you will not regret it!
Cheers to getting and staying organized! Melissa Fortino It’s that time of year when we’re hosting, taking dishes to loved ones’ homes to share, and cooking and baking more than usual. Organizing your refrigerator and freezer this time of year can help ensure you’re totally prepared for the big holidays that are about to hit! Step 1: Sort and Purge I recommend completely organizing the fridge first, and then the freezer so your food isn’t sitting out as long. Begin by going through all of your food in refrigerator, looking for signs of mold, rot and expired dates. Compost, pitch, or put down the garage disposal as needed. Be sure to note when the expiration dates on condiments are listed for when it’s stayed unopened in your fridge vs if it should have been used within a set number of days once opened. For example, mayonnaise is good for 2 months after opening, and chicken broth generally lists 7-10 days once opened. In the future, if you’re not already doing it, I recommend labeling the condiments directly on the container with the "opened on" date with a permanent marker. This is a foolproof method to remember when you opened each container. As you purge the items you don’t want anymore, sort the items that you do want, like with like. Use your kitchen counter to sort onto. Once you’re done sorting and purging then move on to step 2. Remember, you’ll repeat this same process in your freezer once the fridge is complete. Step 2: Organize and Contain Now it’s time to put everything back in the fridge! For some people, getting an egg organizer, special bottles for beverages like milk and orange juice and other containers for transferring food into is a dream come true. For others, it’s a nightmare with an additional step. This is completely a personal preference. You know you, and if it’s going to make you happy, then do it! If it’s going to make your life harder, then skip it! No matter what the container is for your eggs, milk and OJ, you’ll want to store like items together throughout your fridge and freezer. I often put vegetables in one produce drawer, fruit in the other, meat and cheese in the skinny deli drawer, maintain an open spot for eggs to live, clear a spot on the top shelf for leftovers to stay together (again dated with the prepared on date is a great way to steer clear of foodborne illnesses). It's helpful to have a tall spot, either in the main part of the fridge or on your door, for large beverage containers. Lastly store condiments in the door, keeping like with like, or on lazy Susans if you have room on a shelf. Clear acrylic, fridge-safe containers can also be helpful to create division on your shelves to contain categories. No matter what, always measure before you buy containers! In a freezer it’s the same idea, like with like: smoothie ingredients together, ice packs all together, dinners together, and so on. You are creating a home for each category to make it easy to find what you need and to put groceries away quickly and easily. Step 3: Label & Walk-through
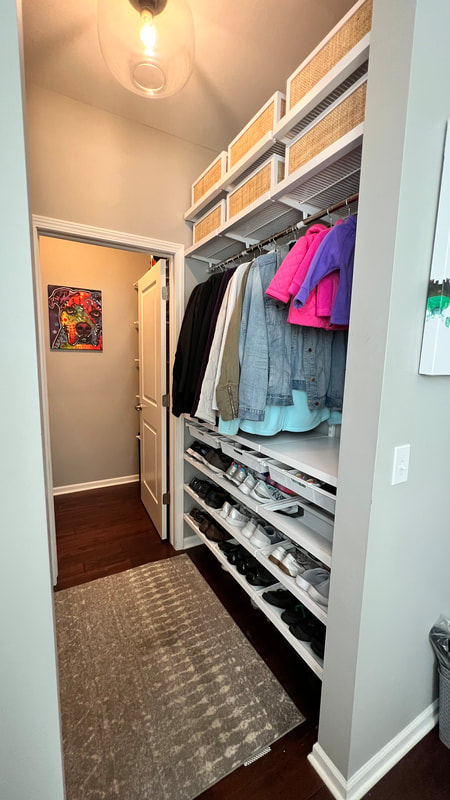
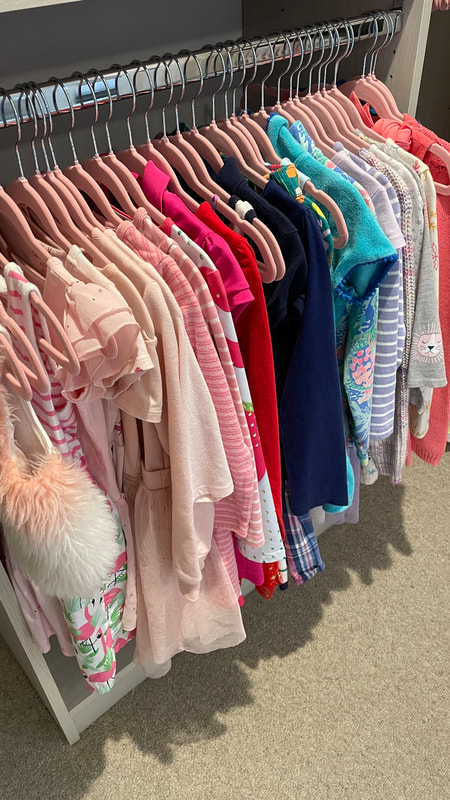
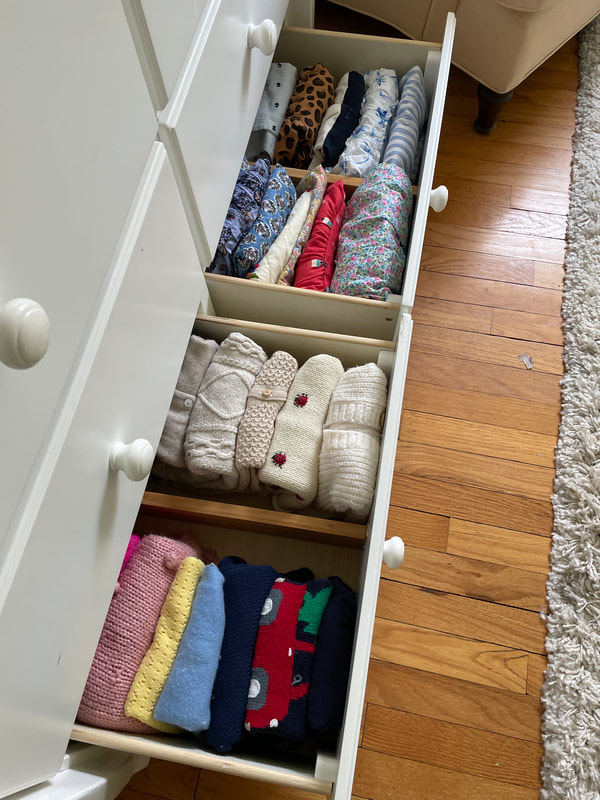
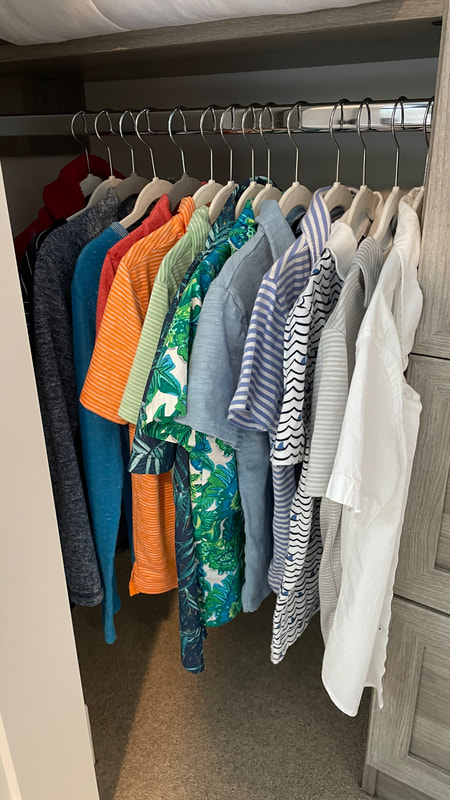
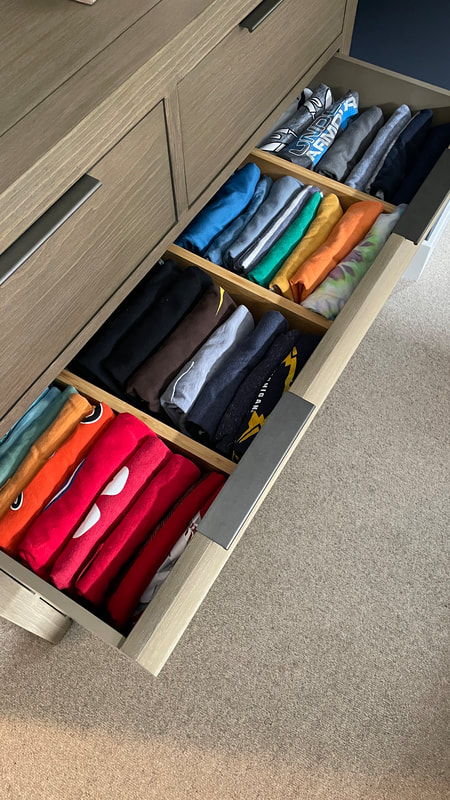
Now that you have everything in place, it’s time to get your label maker out and label the containers you put into place. Once you’ve labeled everything, it’s time to give the whole family a walk-through. Show them where things ended up, explain the changes you made and why you made them, and talk about the importance of putting things back in their new homes. The labels will help with this, as they serve as a roadmap to an organized fridge and freezer system. This is also a good time to talk with your spouse/partner about checking the fridge and freezer and making a grocery list before they go grocery shopping to help eliminate duplicates and excess food, which leads to waste and things going bad before you've had a chance to eat them. I know this will make life easier for you as the holidays approach. Opening up an organized refrigerator and freezer is truly a great feeling! Happy Thanksgiving & enjoy your newly organized fridge & freezer! If it's time to go through your or your family’s clothing, but you find yourself wondering, "where do I begin?", this step-by-step guide is for you! Step One: It’s time to purge! Go through your closet and dresser item by item. Decide what you need, use and love out of your clothing. The items that you no longer want might be worn out, out of fashion, or the wrong size. Decide if you should throw them away (think stains and tears) or donate them (think new or gently used). Create a bag for each, and make a plan for getting the donations out of your home. Decide where to take the donations, when and at what time. Create an appointment on your calendar and stick to it! Step Two: As you purge, sort the items you’re keeping like-with-like. Create piles (for example, on your bed) for each type of clothing: pants, shorts, sleeveless tops, short sleeve shirts, long sleeve shirts, etc. This will give you an inventory of what you own, and you may get rid of more once you see just how many pairs of jeans you have. If you’re keeping clothing in sizes not currently being worn, sort those items together by size. Store these items in the closet on high shelves or in bins in storage. For children's clothing, mark a date on your calendar when to incorporate the next size up into the closet. Step Three: Now that you’ve sorted and purged the clothing, it’s time to organize it! You can decide at this point what makes sense to hang versus fold based on the space available and the size of the category. For each hanging category, you’ll want to organize it in rainbow order from left to right on matching hangers. We love the slim velvet or acrylic hangers. Long items like dresses should go in the long hanging space. For the clothing going in your dresser, for example graphic t-shirts, we like to file fold, which means placing them in the drawer the way that files go in a file drawer. This gives you the ability to see what you have from above. If you’re putting folded clothing on shelves in your closet, shelf dividers are handy, as well. If you haven’t already, it’s time to organize the clothing that you’re keeping that’s too small or too big by size, either high up in the closet or in your basement storage room in labeled bins. Be sure to mark your calendar when it’s time to get that clothing out. Staying on top of clothing organization will reduce stress when you’re getting ready, and keep you honest about what you already own so you can change your shopping habits. As a bonus, an organized closet truly does look beautiful. As always, if you’re feeling stumped still or are overwhelmed by the thought of doing this we’re just a phone call away to help.
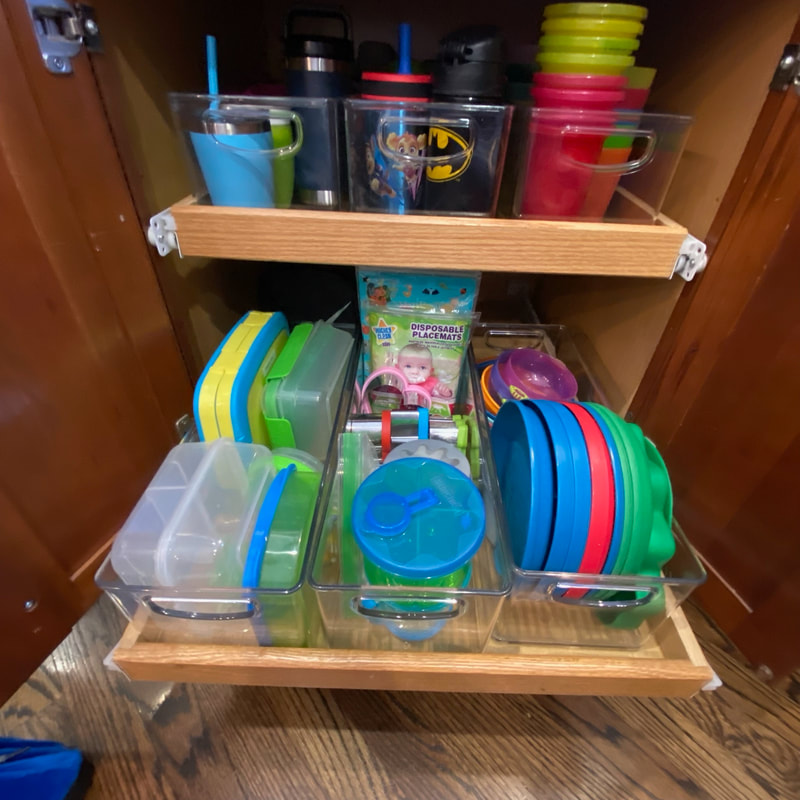
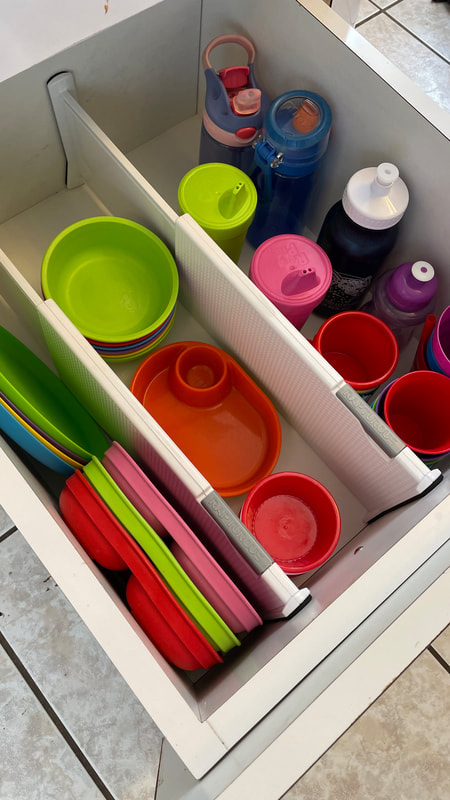
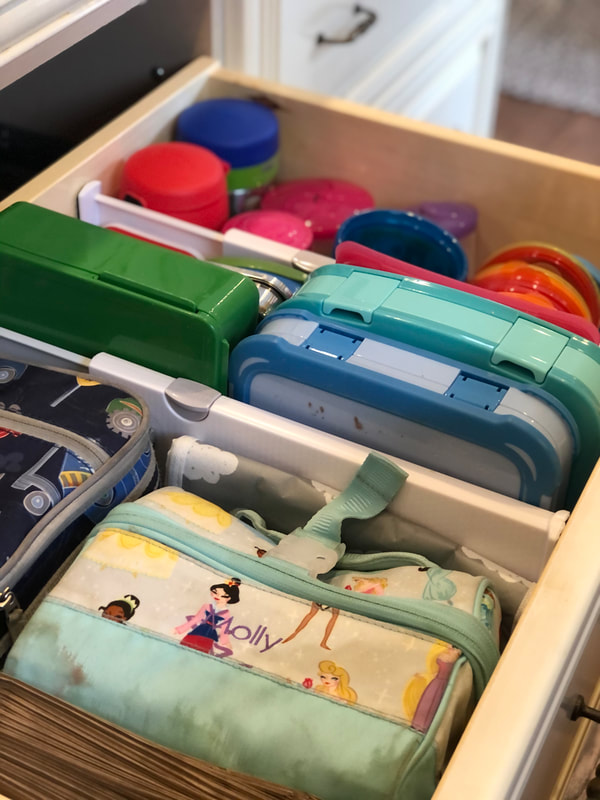
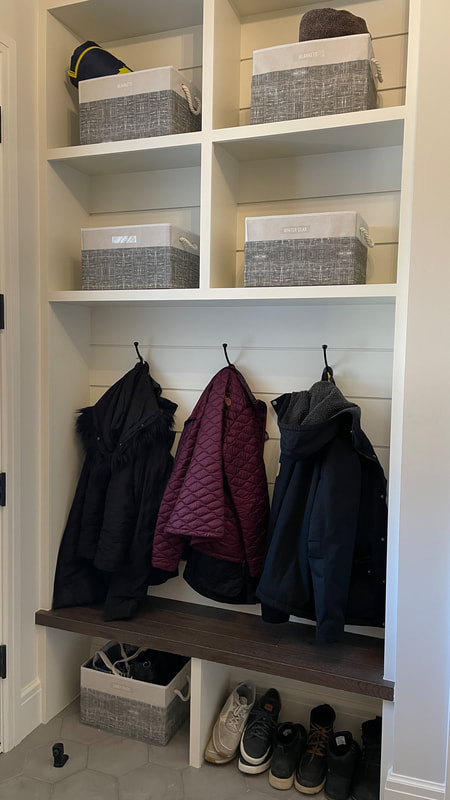
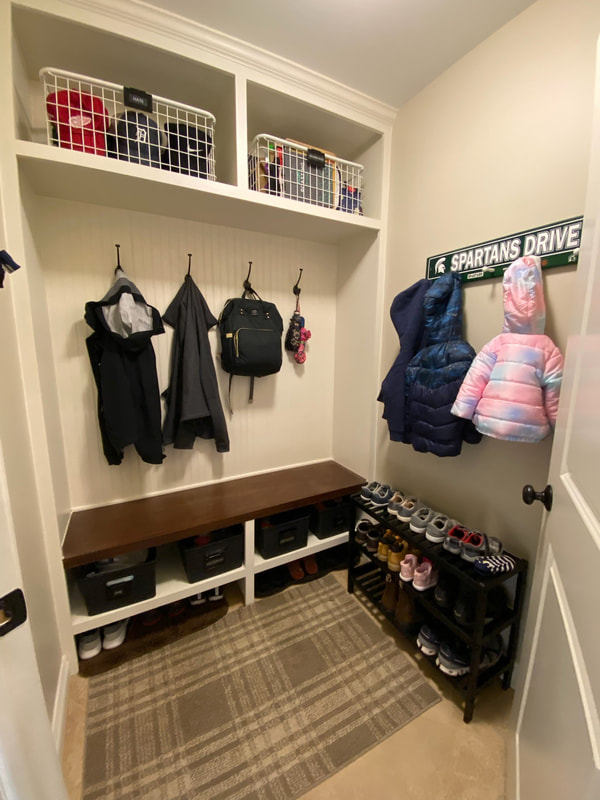
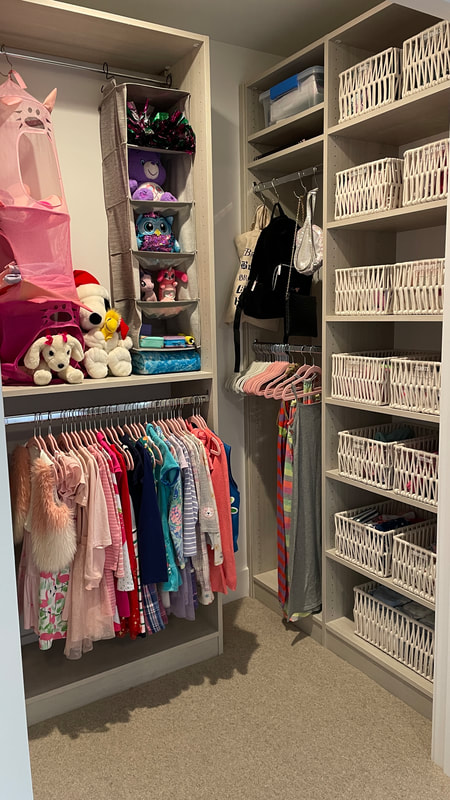
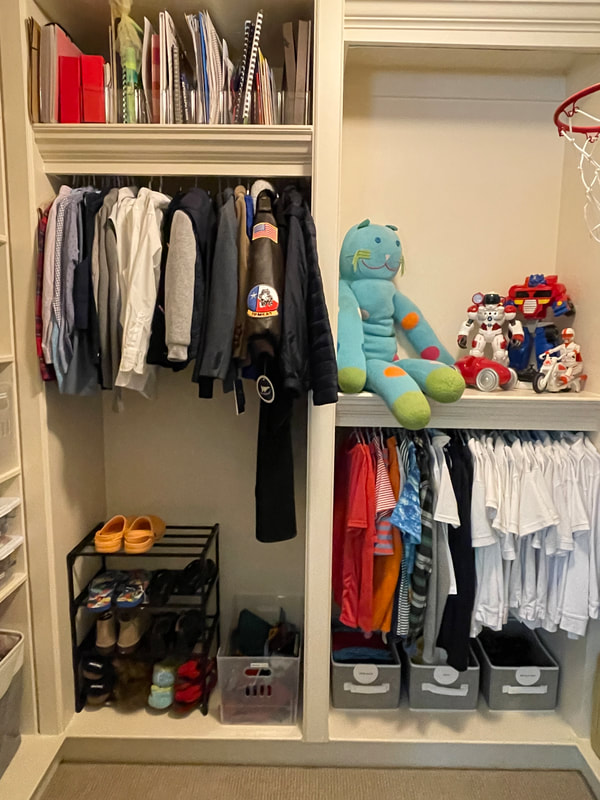
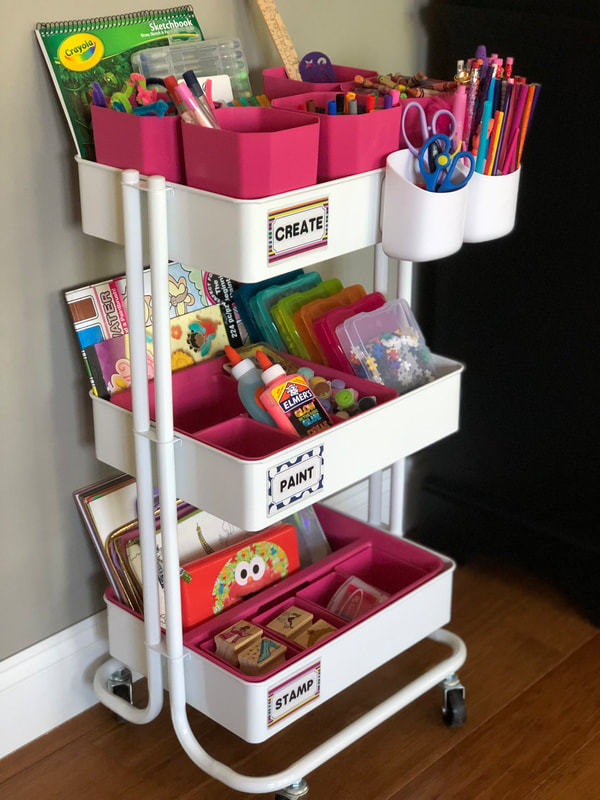
Happy organizing! Melissa Fortino Back to school is the perfect time to get all of your school-aged children’s belongings organized & purged. Here are the top five areas that we recommend getting organized as the school year kicks off. Area Number One: A lunch packing station in your kitchen. If your children are old enough to help pack their lunch, creating this station low enough for them to be able to reach everything is the first step. You’ll want to house this close to where your food storage (baggies & containers) are located since those are typically used for packing lunches as well. Make sure and purge any worn-out or stained lunch boxes that need to be replaced as well as any mismatched or broken food storage containers. Then gather everything you’ll need to make this space complete: lunch boxes, water bottles, thermoses, food storage containers specific to your children’s lunches, plastic ware or silverware only used for their lunches and a notepad and pen/marker for writing them a note if you like. Often a large pull-out bin drawer is best suited for this station. The goal is to eliminate stress caused by having to pack lunches the morning of or the night before school. Make it streamlined and easy with drawer dividers or bins that fit the space you are utilizing. Don’t forget to measure before you buy! Area Number Two: Your mudroom. This space in your home is usually off of the garage and the first and last space within your home that you see when going in or out to the garage. It’s a high-traffic area and can easily become cluttered with shoes, coats, hats, gloves and the like. Start by sorting and purging the space, getting rid of items that are worn, torn or too small. Get the backpacks cleaned out or move in the new backpacks. Create a bin for hats, gloves and scarves either for each person or by category depending on your family. Make sure that only the shoes used every week are stored in the mudroom, try keeping the rest of the shoes in each respective person’s closet if possible. Give each person a station for coats, book bags and extracurricular activities bags whether that’s a hook, a section in the closet or a section on a built-in. Make sure that everything that remains is truly what your family needs, loves or uses. Labels are a great way to keep your mudroom organized throughout the school year so don’t forget to do that at the end! Area Number Three: Your children’s keepsakes. Back to school is the perfect time to create space for the keepsakes that will inevitably be coming home from school with them. We recommend creating a tote/bin for each child stored in the basement storage room on a shelving unit where their keepsakes can live. Within the bin, you can organize the keepsakes (artwork, schoolwork, awards, etc) by grade if you like. If you already have this established for your child now is a great time to purge it. Sometimes we keep things that seemed special at the time but once revisited we realize they don’t hold a special meaning. You can also make the tote/bin your boundary, explaining to each child that once his or her bin/s are full it’s time to eliminate some stuff. Help them identify which items they love the least and make some room for new ones to come in. Another option is to create a file for each child in your home office or home office station in your kitchen and then add to it throughout the year. At the end of the year, you can then move the full file to the tote/bin located in the basement. Do what works best for you and is the most realistic based on time and motivation. Area Number Four: Your children’s closet and dresser, more specifically their clothing and shoes. Now that the school year is about to begin or is beginning new clothes and shoes are bound to come in to kick it off. It is the perfect time to sort, purge and reorganize each child’s closet and dresser. Start by sorting and purging, getting rid of the items that are again, worn, torn or too small. Sort the remaining items you’re keeping like with like. For example, all leggings together, all tank tops together, all dresses together, etc. Once you have the closet and dresser emptied begin to evaluate where each category will best fit. For example, dresses are better hung than folded and leggings can easily be file folded in a drawer if hanging space is limited. Go the extra mile and invest in matching slim hangers. We love the children’s velvet or acrylic hangers the best for little ones and older teens the adult size velvet or acrylic hangers. Take the tags off of new clothes so that it makes it easier to get ready in the morning and the tags don’t become trash littering the floor of the closet or bedroom. Utilize shoe racks to maximize the space on the floor of the closet so that shoes that aren’t in the mudroom as weekly wear shoes have a good home. Organize each category of clothing by color using ROY-G-BIV as your guide. This makes the closet look great but also helps your child find what they need when they need it. Area Number Five: A homework station. Whether it’s in a central part of the house or each child’s bedroom creating a designated space where they can do their homework and store school supplies will help them achieve success in school and create a calm environment for them to do homework in. You could organize a desk with drawers using drawer dividers grouping everything like with like. Make sure there is a charging station for electronics and a lamp for them to see by. A bookshelf next to the desk is also a great option, giving them additional storage but also a place for their books to live. Creating a lunch packing station, organizing your mudroom, getting keepsakes collected from throughout the house, sorting and purging clothing and shoes and designating a homework station will create the environment your child needs to feel good about the new school year. It will also have a ripple effect on the rest of your house too; once you get these areas organized you’ll want to keep going! Not sure how to do all of this, or feeling overwhelmed with getting started? We can help you with all of this and more, just get in touch with us to schedule your discovery call and we’ll talk through your needs and figure out the best place to start.
Here’s to a successful and organized school year! |
Utterly UnclutteredHelping feed your urge to purge clutter from your life! DISCLOSURE: My blog posts may contain affiliate links. This means that I earn a commission from qualifying purchases should you decide to make a purchase through my links, at no additional cost to you!
Archives
March 2024
Categories
All
|

