|
Congratulations! You’ve bought your first home. Now it’s time to get it organized! If you start on the right foot in your new home your day-to-day stress will be lower, you’ll save money and you’ll enjoy the space more. So, where to begin? Here are the top tips for getting organized after buying your first home: 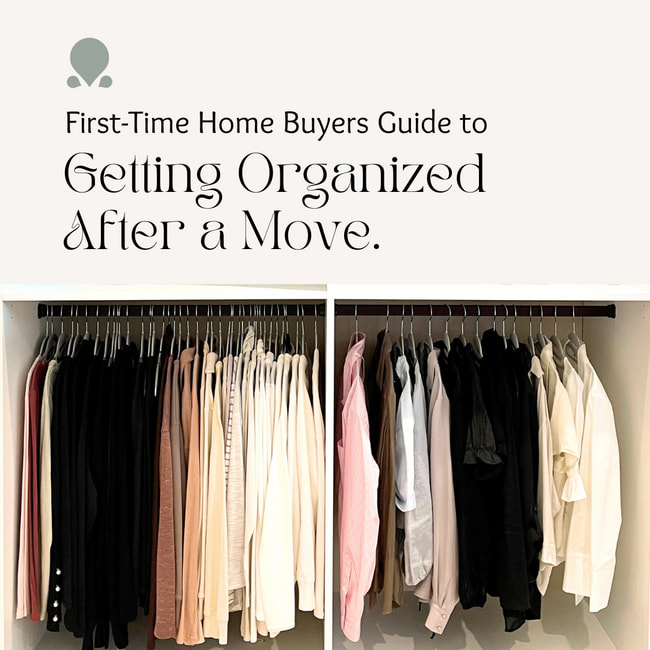 Tip #1:When unpacking, sort similar items together before deciding on a home for them. Too often people pick a home for storing a category before completely unpacking, only to find out the space they chose originally isn’t big enough for how much they have. As a result, similar items land in multiple places throughout the home. Instead, sort everything first to get a birds-eye view of what you have overall, and then pick where each category goes. It will save you time and will also help you purge an excess amount of a category that you have too much of. Let's use kitchen spatulas as an example. Once you see all of your spatulas together, it will be easier to let go of the partially melted one when you see you’ve got three others still in great shape. Sorting first is hard because it does look like it’s getting worse before it gets better but I promise it’s the right way to do it and so worth it. This is especially important if there are two people’s belongings getting merged for the first time. Sort like with like every step of the way. If this feels especially daunting but you know it's important, this is the perfect opportunity to seek help from a professional organizing company. Tip #2:
Tip #3:Unpack every box, yes, every box. I know it may seem daunting but cardboard is not your friend (it gets moldy and musty quickly in basements) so move your belongings out of the moving boxes ASAP. I can’t tell you the number of times that I have organized homes where there are boxes that have never been unpacked after years of living in the home. They will come back to haunt you, so it is best to start out on the right foot and unpack every box. Have a box of keepsakes? Transfer those to a plastic tote with a lid to keep those treasures safe. Did you turn a kitchen drawer upside down and dump the contents into a box? Methodically unpack, sort, and redistribute the items to the correct room. You can do it! Your future self will thank you. 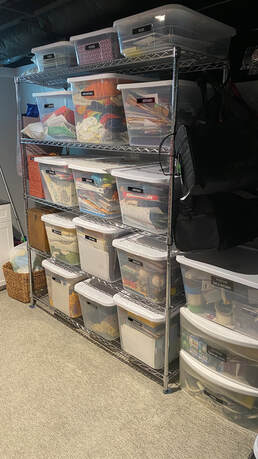 Tip #4:Purge as you unpack. If you didn’t purge before you moved, now is the time to do it in your new home. Even if you came from a smaller apartment, odds are there are items you can purge. Be honest with yourself about what you need, use, and love, and get rid of what you don’t. Look for items that are worn, broken, or don’t fit anymore. Expired food should get tossed, and anything that doesn’t look appetizing should move out. Get rid of cookware you have duplicates of if you’re merging two people’s belongings. You’ll feel lighter and more free after your purge, and what better time to do it than with the clean slate of a new home? Tip #5:
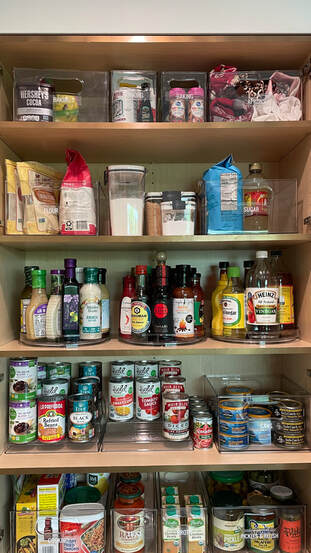
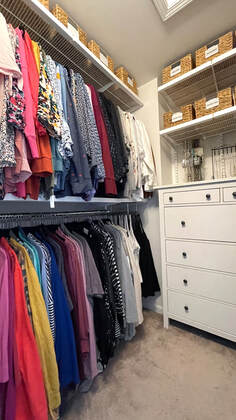
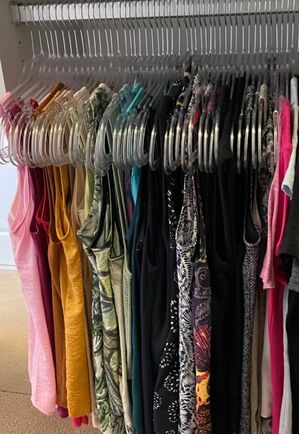
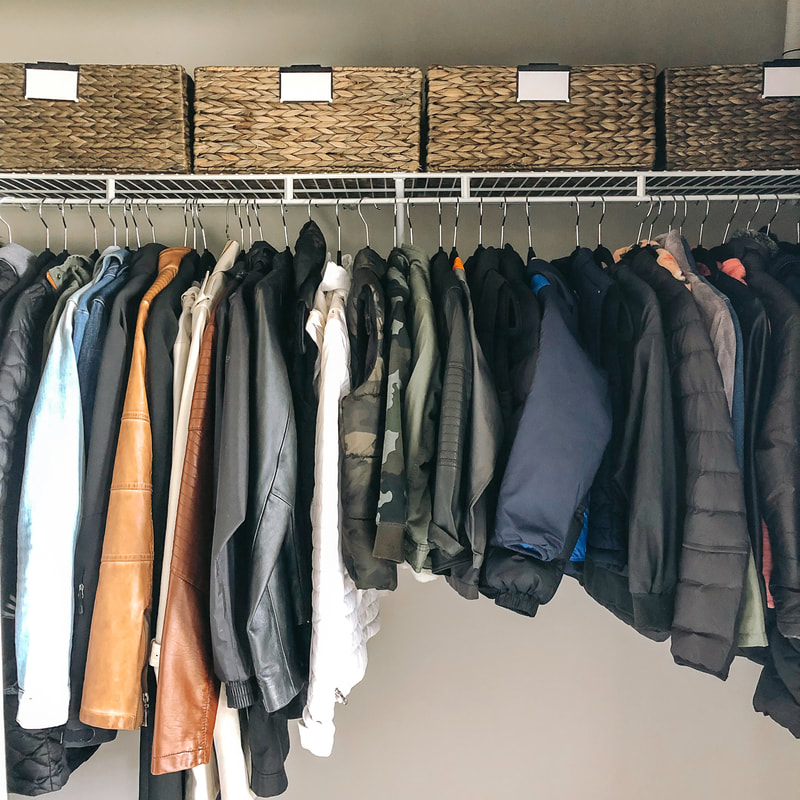
Tip #6:Invest in matching hangers. Remember that closet where you just organized everything by type and color? Now it is time to go the extra mile and get matching hangers. We often recommend velvet hangers, but any slimline matching hangers will do. Make sure the metal of the hooks match and the color of the hangers match. It will transform your closet once you take this extra step.  Tip #7:Don’t fill a space just to fill it. This is your first home so you may not fill every cabinet, shelf, or drawer. This is okay! It is organizing gold when you have empty spaces because it allows for room to grow. You’ll get new belongings down the road (housewarming party, holidays, birthdays, and shopping) so leave some space for the items that haven’t come into your home yet. Just because you have space doesn’t mean you have to fill it with something. It’s okay to let an open shelf be an open shelf until its purpose surfaces organically over time. Tip #8:Keep things tidy in your new home long-term by picking up as you go. For example, when you do your hair in the morning, instead of leaving the hairbrush, curling iron, and hairspray out on the counter, put those things back in their home (once cool to the touch for the curling iron) in drawers and cabinets. You’ll be amazed at how much faster it is to just pick up as you go instead of spending entire days on the weekend trying to backtrack and pick up what you didn’t put away. It takes just a few seconds to put something away the moment you’re done with it. This will also help you find the items faster the next time you or someone else you live with needs them. Tip #9:Invest in a label maker. They are worth having, especially if you live with another person/other people or have ADD/ADHD. Labels are a map and if everyone is reading the same map they’ll get to the same and correct destination. Pantries, basements, garages, closets, bathrooms, and nurseries are all some of the spaces that we regularly label. We love our Brother P Touch label maker and recommend it all the time. It will make life so much easier!
There you have it, those are the top tips for a first-time homeowner to get organized. If you follow these tips now and for all of your future homes you’ll be thankful, will have lower stress, and will save money. Feeling overwhelmed about where to begin or how to do these tips? We’ve got you! Just give us a call and we’ll help make your first home cozy, organized, and fresh. Congratulations again! Melissa Fortino
0 Comments
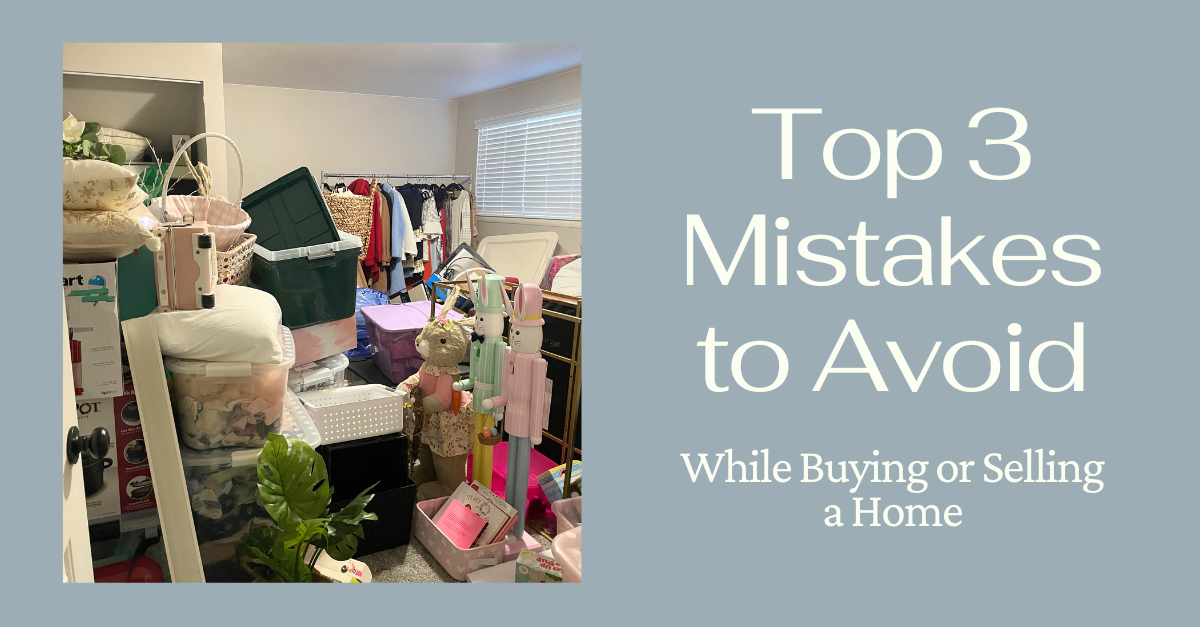 We all know that feeling of moving into a new home, unpacking and then realizing there were some things we should have paid closer attention to. Here are the Top 3 Mistakes to avoid while buying or selling a home from a Professional Organizer's perspective. Mistake Number 1: Underestimating how much storage space you need.You want to ensure you choose a home with enough storage in the basement and enough closet, pantry, kitchen and garage space for your family's needs. People often get swept away with the size of a home, architectural features or zip code. If the primary bedroom closet is a nightmare or you have nowhere to store your holiday décor or children's sports equipment, your new home will feel cramped. Storage space is essential, so here are some questions to keep in mind:
Mistake Number 2: Underestimating how much stuff you need to move.Now is the time to really get down to the nitty gritty of exactly what you own in your current home. A lot of people, especially those that have lived in their homes for decades, underestimate just how much stuff they have packed into every nook and cranny from basement to attic. Get realistic about it and start going through each room evaluating what you no longer need, use or love and purge those items now. Not the day before the movers come, or the day before you’re supposed to start packing. Not once you move into your new home, but now. This will do a couple of things. It will help you know how much storage space you truly need in your new home, and it will stop you from moving literal trash or donations into your new home. How nice will that be? Go room by room and delve into every drawer, every cabinet, every closet, every dark corner of that basement and attic and unearth your treasures and trash. It is worth doing. It will help you have an honest conversation with yourself about the volume of belongings in your home. Mistake Number 3: Skimping on Staging.This means listening to your realtor when they suggest decluttering your home and taking down personal items. Hire a professional organizer and a home stager to help you maximize the flow of your home, show off its best features, and above all, help you prepare for the move. Why take the time to declutter and stage your home? It helps to sell your home faster and for more money. The proof is in the numbers, just ask your realtor. Make sure that you remove worn out or unnecessary furniture, and consider renting furniture or decor that suits the space from a professional stager. Make sure each room is well lit so that the house doesn’t feel dark and depressing. Once again, declutter to show off the counters, the floor space and the storage space so that it doesn’t look cramped and overcrowded. You want potential buyers to feel good when they walk in your home, not overwhelmed by clutter. Have you been meaning to paint? Now is the time to get that done too. Fresh paint can brighten a room and cover up any blemishes that may have happened while you were living your life in your home.
Avoid these 3 mistakes, and buying or selling your home will be a breeze! It’s hard work but so worth it for the long-term benefits. Not sure where to begin? We can help you out with that! We’ve got a starting point figured out and know exactly how to tackle every home, no matter the square footage or volume of belongings. Let us make your home, new or old, Utterly Uncluttered! Happy buying and selling, Melissa Fortino Are you a realtor overwhelmed by clutter in your client’s home? Are you, yourself, overwhelmed by the goal of decluttering your realtor has given you? We are here to help and have some tips and tricks to help you get your home ready for those beautiful photos to get your home listed, as well as for packing & showings. Tip Number One: Clear clutter from the counters. Cut the clutter by being honest about what you actually need out on counters. Begin by eliminating the obvious trash, recycle items, and start finding new homes for the items you’re not using daily. You want clear, open spaces for the photos to list your home to maximize the appearance of how large your space is. A cluttered counter truly makes a kitchen or bathroom look smaller than it is. Time and time again, our clients are amazed by how much bigger an organized space looks and feels. Keep your counters clear by creating homes for everything within cabinets and drawers. This also makes it easier to be prepared for open houses and showings. Instead of scrambling to clear counters at the last minute, they will already be ready for visitors.  Tip Number Two: Make sure your floors are clear of clutter. No dirty clothes on the laundry room floor, no toys strewn about the playroom floor, and no shoes all over the mudroom floor. Not only does this make the space look bigger when the floor is clear of clutter but it’s safer for you and others walking through your home since there aren’t tripping hazards. Create more permanent homes for those items like a hamper in the laundry room, cubbies with cubes in them for toys in the playroom, and shoe racks in the mudroom for shoes. The way your floor looks changes the look of the whole room and in turn your house. Nobody wants to step over dirty laundry during a showing.
Tip Number Four: Take down personal items. Most realtors will tell you to do this but we’re going to reinforce this rule, start taking down and storing anything specific to your family. Family photos, plaques with your last name on them, vision boards, anything that makes it hard for someone to see their family living in your space. While you’re at it go ahead and purge any that you don’t see yourself using in your new home. Items that you’ve outgrown or just don’t suit your taste anymore are great contenders to move out of the space. You want someone to be able to easily imagine their family in your home when they walk through it.
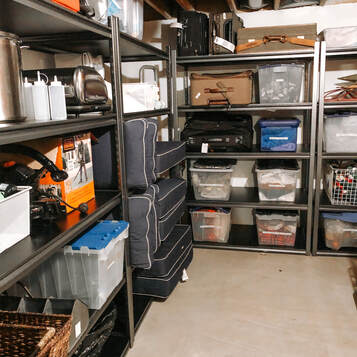
Tip Number Six: Sort items like with like and to the room you use the items in. Even if you hire us to pack your items for you (which is a service we offer) this will make the packing process so much easier if you do this throughout your home. This way, similar items are packed together and labeled with the correct room on the box for where they belong. This will also allow you to purge more readily as once you see how many you have of one item it becomes easier to let some of them go especially if there are a few that are more worn out than others. Think of each item as a category and sort your home this way to make life easier on both sides of the move. Tip Number Seven: Unpack and purge old boxes from your last move. Do you still have boxes or totes from a previous move that never got unpacked? Why would you move those again? Now is the time to go through that storage room and unpack those containers. If you haven’t used the items since you moved into your home you likely won’t use them in your new home. Anything that you want to keep should get stored on shelves in totes clearly labeled making it easy to move and store in your new home. Storage rooms can become a catch-all, and this is the time where every door in your home will be opened by strangers. It’s time to get honest about what you are keeping.
Tip Number Nine: Create a good flow in each room. Staging your home is really important. Make sure the room’s pathways are clear of unnecessary items and furniture. Eliminate any furniture (you can put it in storage) that makes a room feel cramped or smaller than it is. You want each room to clearly show its purpose and create a welcoming environment. Create a cohesive look by clearing the clutter on bookshelves and creating vignettes where things are grouped in an aesthetically pleasing way. Organizing books by color is an eye-catching way to organize a space, for example. You’re creating a space that looks great in photographs by staging it well. A few matching throw pillows, a blanket, and a rug that ties the room together can make all the difference. Healthy plants can also add depth and character to a room and create warmth. You want your home to feel welcoming and clutter-free. 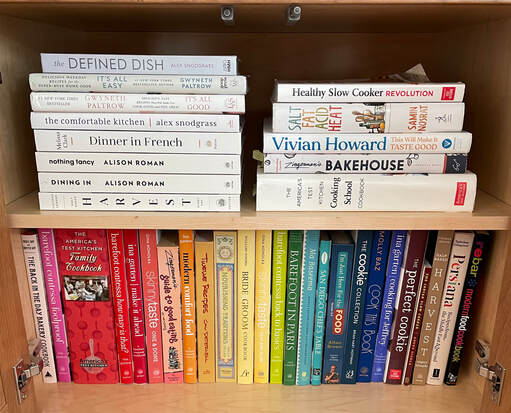 Feeling overwhelmed and not sure how to accomplish all of this? We’re here to help you in all aspects of preparing your home for sale, maintaining it during showings, helping you pack once you’ve sold it, and getting you organized in your new home. Schedule your discovery call with us today to find out what availability we have in the next two weeks as well as further out in the future if you’re a planner. No matter what stage you’re in, we're here to help. You’ll be grateful for the organization and will love showing off your home. Happy selling!
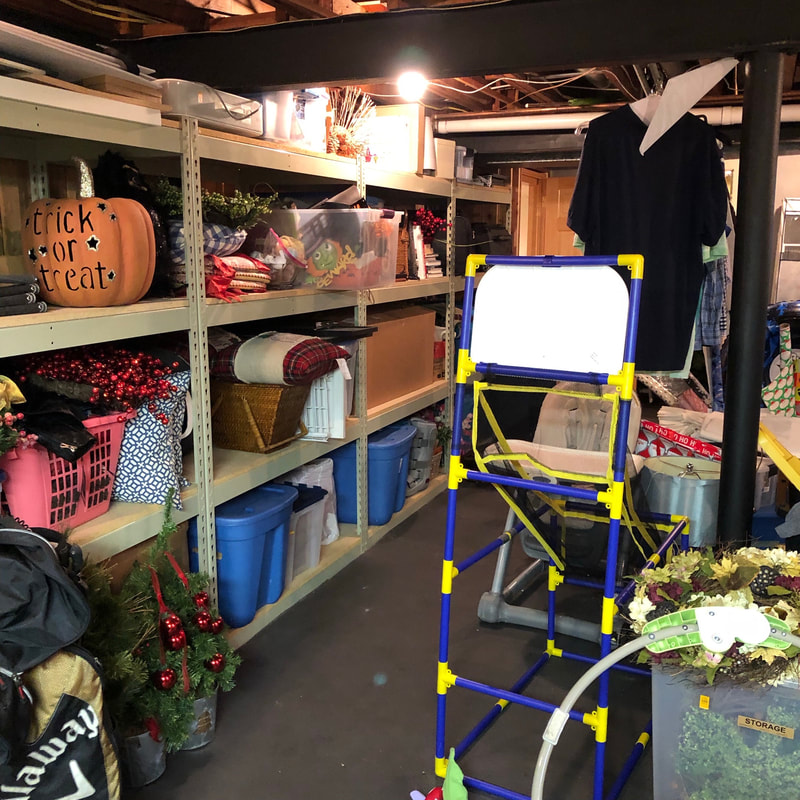
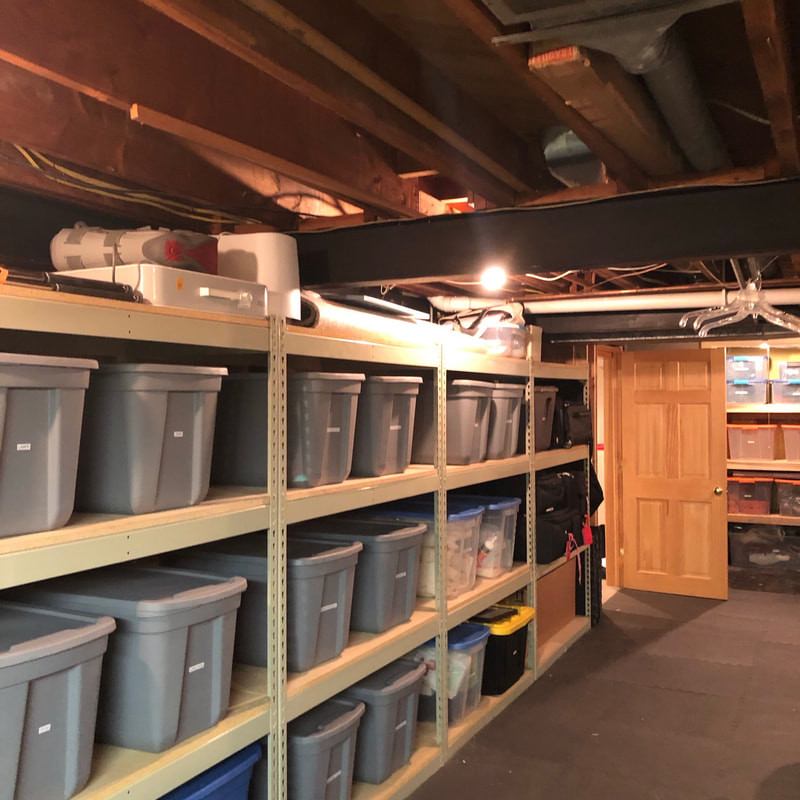
- Melissa Fortino Getting Organized for the Holidays: How to Save Yourself from Holiday Stress Do you find yourself loving the time with family during the holidays but dreading all that comes with it? Decorating, gift giving, cookie making, Elf on a Shelf, the list goes on of all the tasks that come with the season of gratitude, merry-making, and cheer. What's the best way to make life less stressful so you can slow down and enjoy the Thanksgiving turkey, Hanukkah moments & the Christmas lights? It's by getting organized for the holidays ahead of time. Here are our Top 3 Tips for Getting Organized for the Holidays and staying that way into the New Year. Tip Number 1: Organize your holiday décor. Are your holiday decorations spread-out in nooks and crannies throughout your whole house? Or is it piled up in unmarked boxes with that smell of mildew in your basement storage room you can't walk through? Or worse yet, is it shoved into that scary crawl space above your garage where only the bats lurk? It's time to gather all your holiday decorations from throughout the house and take an honest look at them. Ideally, this would take place in your basement. Start by sorting like with like, each holiday in its own area and subcategories within that. For example, you would categorize all Christmas items, all tree ornaments, all mantel décor, all the kitchen decorations, and so on. Make decisions on what to keep and what to get rid of by keeping only the items you need, use or love. Is it broken? Haven't used it in years? Does it only hold sentimental value but it isn't something you'd put out? Those might be items to get rid of or in case of the latter move that item to your keepsakes/memorabilia bin, which should be stored separately from your holiday décor. Once you've sorted and purged everything, tested all the lights, and made the tough decisions it's time to organize the décor. We recommend utilizing plastic storage totes with lids for your holiday décor. Clear is always the best option but some people love doing color coding so black & orange for Halloween, red & green for Christmas, blue for Hanukkah & so on. Gently wrap all fragile items in tissue paper or bubble wrap, pack the totes the way you sorted the subcategories within each holiday, and then clearly label each tote with the holiday name and what's inside but be broad. I've even put Christmas PJs, headbands, sweaters, etc. all in one tote for families, especially when their closets and dressers are maxed out. This way you're not battling the Christmas PJs in July when you're putting laundry away. If you don't have shelving units for your basement storage room now would be the time to get some. Line your basement storage room with shelves and even in the center if there's room, think of how the grocery store or library sets up their shelving in aisles, you can do the same. Now place your totes on the shelving units in the order that holidays occur. For example, start with the calendar year beginning with January (New Year's) and end with December (Hanukkah/Christmas). If you think about your year in terms of the school year, start with September (early fall décor/Halloween) and work your way through to July/August (4th of July/summer décor). Organize the totes from left to right. Now take a step back & breath in the organized bliss that is now your storage room. It's breathtaking!
Tip Number 2:
Make lists, and check them twice…it's not just for Santa Claus. Take a moment before everything gets hectic and make some master lists. The top lists I recommend are: Gift-giving list. I include whom it's for, the gift requested/idea, and the goal dollar amount to spend. Once the gift is purchased I update the list to the actual item purchased and the amount spent. You can use this list for future years to help budget and to make sure you're not giving the same things over and over. Gift receiving list. This is where I track the gift ideas for gifts that I'll be receiving. I write down the idea/s and to whom I gave it. You can do this for yourself but also for your spouse and children as well. This way you don't give the same ideas to everyone and when you're asked for ideas you have thoughtful suggestions that you can give right away. On a side note, I highly recommend asking people for their wish lists; I even go so far as to ask what they don't want more of. It's a great way to make sure the gifts you give and receive don't end up in the donation pile by New Year's Day. Menus and ingredients lists. If you're hosting or bringing a dish to the party this is an easy way to stay calm when the party approaches. Make a menu list spelling out everything that will be served noting which dishes you're making. If you're bringing a dish just skip this step. Then, in a separate list or as bullet points to each dish make a list of the ingredients you need for each dish checking them off if you've already got them in stock. Use this list when you go grocery shopping closer to the party date. To-Do List. What are the extra things you need to do surrounding the holiday season? It can be a brain dump where you just get it all out and then add items to your calendar from there. Think schedule cookie making with sisters, shopping for gifts, decorating the tree, and the list goes on. Getting it all out in a list will help lower your anxiety and will help you stay organized…it may also help you become more realistic about all you're trying to accomplish in a short amount of time. You just might take some things off your list when you see it all in black & white. To make your lists use whatever method works best for you, for some that's a dedicated notebook for the holidays, for others it's the Notes App on their iPhone (that's me). Make sure you update your lists as the holiday season progresses and don't forget to cross off what you've accomplished for that oh-so-wonderful dopamine rush! Tip Number 3: Gift-wrap early. Start by organizing your gift wrap just like you organized your holiday décor. If you have enough room in your home for a gift wrap station complete with a flat workspace for wrapping gifts on, even better! There are tons of gift-wrap station organizers out there and it all depends on your space and budget. As you organize take inventory of gift wrapping, gift bags, tissue paper, ribbons, bows, and tags. Throw away the scraps and anything you won't use and make a list (there's another list!) of the items you need more of. Then, as you buy each gift, wrap it! Don't wait until Christmas Eve to do all the wrapping, divide and conquer and wrap those gifts as you buy them. You'll thank me later! If you organize your holiday decorations, make master lists to work from, and gift wrap early, you'll be able to put your feet up and sip some hot cocoa more often than ever before during the holiday season. Organizing takes time, but it gives you time back, which is the best gift! Save yourself from holiday stress and get organized this holiday season. Not sure where to begin? We have a full list of recommended products HERE! Need some help getting your home ready for holiday guests? Are you feeling overwhelmed by your basement? We've got you covered. Reach out to us today, and we'll be your elves helping you this holiday season. Merry Organizing! Melissa Fortino It’s that time of year when we get a new beginning again. The weather is starting to warm up, the snow has thawed and we’re all itching to get outside. What’s the best way to celebrate Spring? With some spring cleaning! Get your house fresh and clean with these easy tips and you’ll spring into an organized home. Do these 3 steps one room at a time.
Step 1: Clear the Clutter Start by evaluating what you Need, Use & Love. Donate, sell, recycle or throw away the rest. Just getting the trash out of your home will lighten your load. And yes, every home has some garbage they can get rid of. It’s amazing what you unearth when you go one item at a time. Think about moving out expired foods from your pantry, the old leftovers in the back of your fridge, the mittens that no longer fit your kiddos, the list goes on and on. Every room should get an organizer’s touch during spring cleaning. Leave no item untouched. As you clear items out, give cabinets and drawers a wipe down and sweep out those pantries and closets once you can see the floor you don’t normally see. Doing the cleaning during sorting & purging is the best feeling as you’re creating a clean fresh slate to launch into step 2. Step 2: Put Systems Into Place The organization you do in your home should work for you, not against you. Everything should be placed as close as possible to where you use the item. Set up bins in your pantry, for example, categorizing food into salty snacks, sweets, canned goods, dinner, breakfast, grab-and-go, and so on. Closets should be organized by type of clothing, so all pants together, all long-sleeved tops get grouped, tanks and short sleeves, and so on. Within those categories organize in rainbow order or ROYGBIV (red, orange, yellow, green, blue, indigo, violet) with browns, blacks, greys, and whites at the tail-end. If space allows, mudrooms should get bins or baskets for hats, gloves, scarves, coats, and shoes organized by person. Have a spot to drop unopened mail with a wall-hanging organizer. Put kids' items down low so they can reach them and help to put things away. Each room should get systems like this put into place at this point. And last but not least label; label everything so that anyone that can read knows where to put everything. Step 3: Show It Off Walk your entire family through the organization that you’ve done. Talk about how the organized space makes you feel and how you hope it makes them feel. Ask them how it feels to be in an organized space. Explain the placement of everything and show them the labels. Explain that this is an all-hands-on-deck situation and that everyone needs to maintain this spring clean-up and overhaul all year long. Not only will this freshen up your space, but it allows you to drop the unwanted items from your life without bringing them into future seasons. The systems you set up should carry you throughout the year and will do the thinking for you. It’s time to spring into action and organize your home! Happy Spring! Melissa Fortino A lot of people feel as though they just don’t know how to organize or that their brains don’t work that way. They feel as though they don’t have the "organizer gene". But can you learn to be organized? The answer is yes, you can! It takes hard work and a lot of focus but you can learn to get and stay organized. Here’s how:
Take a look around and be honest with yourself about what you need, use & love in your home. It’s important to start with decluttering your space because it doesn’t make sense to organize things that should be donated, recycled, or thrown away. Learning to throw trash away right away, for example, is a key step to getting and staying organized. That tag on those new jeans you bought that you’re keeping? It’s trash. The TJ Maxx receipt in your wallet from 3 months ago? Trash. The box from three cell phones ago that’s just chilling in your basement? Time to go. Often people say things like, “I don’t have any trash in my home,” but when it comes time to sort & purge they start filling trash bags. Learning to let go of this stuff faster and sooner is the way to go. Throw trash away right away. You have to also learn to organize every day. Organizing is something that needs to become a habit where you pick up as you go during your daily tasks. It should become as much of a habit as brushing your teeth or eating healthy. Instead of leaving your makeup out after you’re done or the kitchen torn apart from cooking dinner pick up as you go and put things back into their homes right away. This will significantly decrease the amount of time you have to spend cleaning up during your free time. Why wait until later when you can put things away in just a few minutes or less right after you’re done using them? Not sure where things go? Then it’s time to create homes for everything you’ve kept. Learn to organize like with like. This means categorizing your entire home. Create a space for each item by storing it with similar items. Remember the "Sesame Street" segment about one of these things does not belong? Find the items that don’t belong with the others and move them out. Help them find their families. When you look into your kitchen cabinet, there shouldn’t be 8 different categories jumbled together. Pasta shouldn’t be spread amongst 5 cabinets. There should be a categorized pasta section within the food portion of your pantry. From the basement to the attic your home should be a map for where things live just based on where like-items are. It should make so much sense that everyone in your family can follow the organizational system set up. Think about how stores or libraries are categorized. Not sure what room to store an item in? Choose the room where you use the items you’ve kept. Use it in multiple rooms? Choose the room where you use it the majority of the time. If you can learn to throw trash away immediately, pick it up as you go, and store everything like-with-like, then you have learned how to organize. When you get in the flow of doing these three things every day it becomes meditative. Your space will begin to support you instead of work against you. Best of all if everyone in your entire family does these three things every day your home will stay organized. It’s an all-hands-on-deck situation and it takes everyone to be committed to the end goal of an organized home to get there. So yes, everyone in your family can learn these three things too, even the little ones. Learn how to get and stay organized today and have a more peaceful, clutter-free tomorrow; you can do it! Forever organizing, Melissa Fortino How To Organize Your Mudroom
The mudroom is often the first space after your garage that you see in your home. It can fill with clutter at lightning speed, especially when you have multiple children, a spouse, a pet, mail, after-school activities, and a pandemic going on. So how do you organize this often-tiny, important space? Where do all the shoes go? And how about the masks? If your family is like most, this space is a drop-spot, but also often doesn’t have a door on it that you can close to block out the clutter from the next room, which is likely the much-used kitchen. Here’s the key: make it organized so you don’t have to worry about blocking out the clutter! Sort & purge: Start by going through the entire space from top to bottom. Sort & purge using the method of keeping only what each person needs, uses, and loves. Move items that are used in a different room to that room so that you’re only left with what belongs in the mudroom. If possible, keep only the shoes currently being used that week in this space. Create space in each bedroom closet for the rest of the shoes to live. Move donations, trash, and recycling out. Make sure that coat pockets are empty, gloves have mates, and everything still fits everyone. Be sure to sort and categorize the items you're keeping and separate them by person if space allows. Put space back together: Once everything is sorted and purged, begin putting the space together again:
Final touches: Once everything is reorganized, it’s time to label, the most important step! Use bin clips to organize those cubes or baskets, label shelves, and make sure that the categories make sense. Labels are a map - and if someone can read, they can read the map and get to the organized destination. Do a walk-through with your family to show them the organized space, explain the changes you made, why you made them, and ask each of them to be responsible for putting their things away in their home. I hope this helps you reclaim your mudroom so you can come home to Zen instead of clutter! Happy organizing! Melissa Fortino Recycling: you know how important it is, but you're not sure how to do it "right." If this sounds like you, you likely fall into one of three buckets:
I feel so inspired by many of my clients' dedication and desire to recycle properly of the items they're discarding, and I feel like I have a responsibility to educate myself on the topic so I can do better myself and for you. In the past 48 hours, I have done a few things:
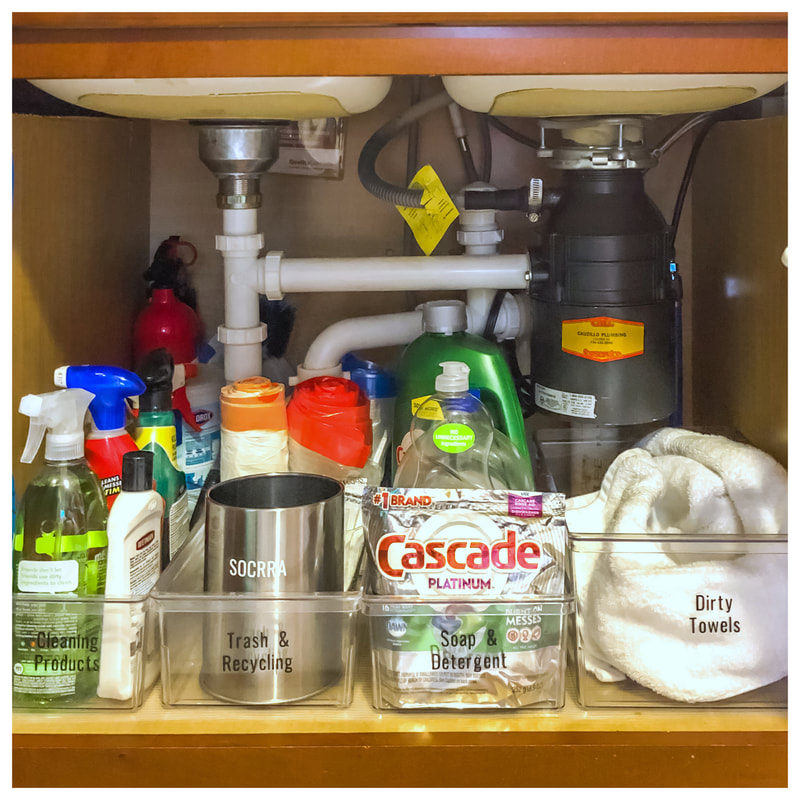
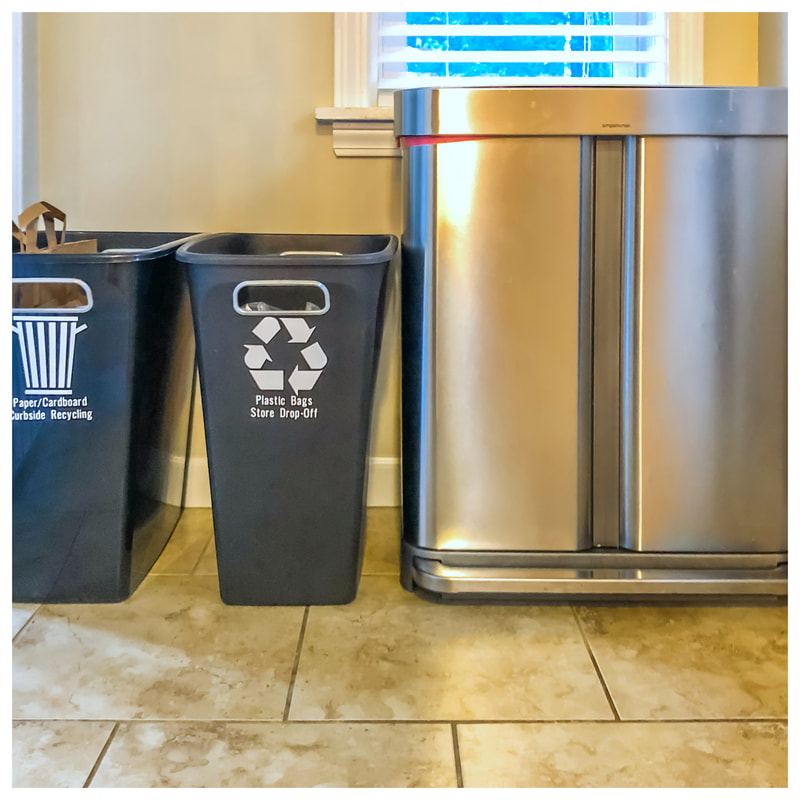
The kitchen is where I notice the majority of our recyclable waste tends to collect, and it is a central location in our house. For that reason, the items we most frequently dispose of need zones IN THE AREA THEY ACCUMULATE. Let me say it another way: convenience is ESSENTIAL for consistency!
I anticipate the small tin I have designated for Batteries/Other Recyclables under the sink to fill up rather quickly, so I set up several larger bins in the basement to collect and separate items that eventually need to go to a recycling facility. My goal is to do a quarterly drop-off, or as necessary. With these bins, I will be able to keep items sorted by type (ex. batteries, paint, electronics, household cleaners).
I felt compelled to share this information because I imagine that, like myself, many people WANT to recycle, know the importance of it, yet lack the foundational knowledge and a system to do it properly. Always remember that learning is continuous and it is never too late to start a good habit. I hope this system helps set you up for success to recycle with confidence and pride! How Prioritization & Trello Can Help You Accomplish Your Goals
Life is filled with many things we don’t want to do, but we do them anyways.
Studying for a test, putting together a presentation, public speaking, making important decisions; these are all things that require preparation and have consequences if not done well. They are also things I tend to procrastinate. When I was in fifth grade, my dad gave me the advice to study a little bit every day, so I wouldn’t have to stress and cram before a test. No matter HOW HARD I TRIED over the years, I couldn’t get myself to do this. 20 years later, I still think about this advice. It sounded simple, but with a due date so far in the future, I always waited until the last minute. When I couldn’t procrastinate any longer, my brain would go into hyper-focused mode and I would always get things done. I wasted a lot of time overthinking and stressing, rather than actually doing. For the majority of my life, I assumed I operated “better under pressure” and identified myself as a procrastinator. Something about that didn’t feel right, because I am also a planner and list-maker. A few months ago, I started thinking about this topic, in-depth. I started reading articles and listening to podcasts and audio books, and quickly noticed a trend: procrastination often goes hand-in-hand with perfectionism. MIND. BLOWN. Maybe you already knew this, but for me, it was like a lightbulb went off in my head. The things I had been procrastinating my ENTIRE LIFE had negative consequences if they weren’t done well, and therefore, I was putting off doing them because I subconsciously knew the amount of time and energy I would have to put into them to gain a PERFECT result. I would overthink, over-prepare by making lists and planning out a schedule, and would attempt to line everything up “just right” before actually starting - but what I was actually doing was procrastinating. By the time I needed to take action, there was no TIME to overthink, I just had to DO.
If you complete that task, not only does it feel good when your biggest task is done for the day, but you will gain more momentum to get the rest of your tasks and goals accomplished!
I’m sure you’ve heard that “a goal without a plan is just a wish.” Thank you Antoine de Saint-Exupéry for this wonderfully accurate quote! Having a plan will give you peace of mind, a sense of structure and stability, and direction, even during uncertain times like the present. Since my job as a professional organizer is primarily done working inside clients’ homes, I have had to make a massive pivot in what I’m focusing on and where I spend my time. Over the past year, Trello has been the single best tool I’ve found to help me manage that. It completely has replaced my paper planner, random to-do lists and functions alongside the calendar on my phone! 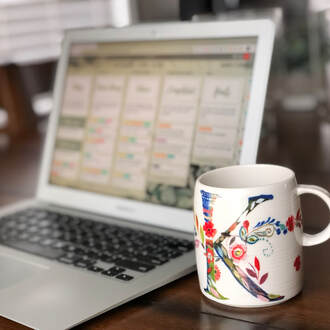
Trello is an excellent tool for business owners, but is also an amazing tool for managing your LIFE, even if you’re not!
I operate off of several Trello boards, but have one board in particular that I call my Life-Management Board. On this board, I include every task relating to my personal and work life that I need to accomplish so I can see it all in one place. You can add due dates, checklists, notes, links, and pictures to your boards, prioritize and categorize them as needed, and keep track of everything from your computer or phone. I have also used Trello to plan trips, study, organize social media content, create shopping lists, to-do lists, and manage projects. Overall, I use it to maintain structure in my days to make sure I’m accomplishing everything I need to. I want to provide a few basic Trello functions to get you started, because over the past year it has become the most essential tool that I use to keep my life organized (and as a bonus, it's FREE!) Once you create an account you will:
I created a life management board template HERE that you can save to your own account to get you off to a good start. To save this template so you can use it, select the button at the top that says “Create Board from Template,” select your settings, and Create. Once you’ve done those steps, the template is ready for you to use! My hope is that this wonderful tool can help you the same way it helped me. With all of my “thoughts, tasks, and reminders” living in one place, I spend significantly less time wondering what I have to do, searching for lists, and second guessing due dates. The drag and drop feature helps me adjust my priorities into a timeline so I can time-block and move my “frogs” earlier in the day, serving as a reminder for me to get those done FIRST. If you use Trello, I'd love to hear about how you like to use it, too! Don't Forget To Tidy Up Before Listing Your Home!
Decluttering & Organizing is one of the most important factors that should be taken into consideration when preparing your house for sale! The tidiness of your home greatly influences potential buyers’ perception of the space and can have a major impact on their decision-making.
Some important spaces potential buyers will be paying attention to are your:
Here are some actions you can take to prepare your home for sale and present it in the best possible light!
Depersonalize
Rent a Storage Unit (if necessary)
|